
How to DIY a Sustainable Christmas Tree
One of our favourite ways to decorate for the holidays is to put up a Christmas tree by the fireplace. Early on, we had a different tree every year, almost always handmade in some way, but this is our favourite version, and so much fun to make and decorate.

You might also spot some of the kids’ favourite holiday crafts, plus our Christmas book advent calendar on the mantel.
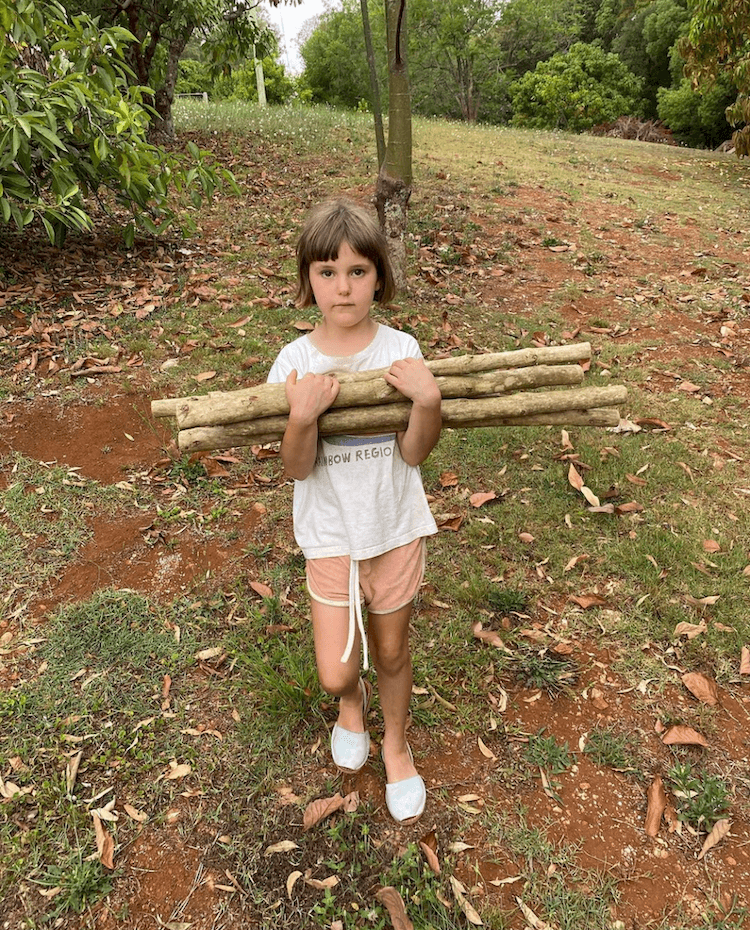
We created this version using branches from the Tibouchina trees on our property, and I love how it brings the outdoors in. The familiar Christmas tree shape creates that festive feeling, and the kids love to decorate it together, along with the rest of the house.

With so much waste generated globally during the holiday season, I also love that creating our own tree with natural elements found in our backyard is a more sustainable, eco-friendly choice.
Best of all, it has become a fun tradition we all look forward to every year. The kids love to lead the project and work together to plan and build the tree, but it’s always a full family effort. The end result is a little different each year, which is part of the beauty of a DIY tree.

How to Make Your Own Sustainable Christmas Tree
If you’re inspired to create your own sustainable Christmas tree, here’s an outline of the steps we took. You can reuse it every year or make another. Of course, you can create a version that fits your home and style, and the kinds of materials you have available.
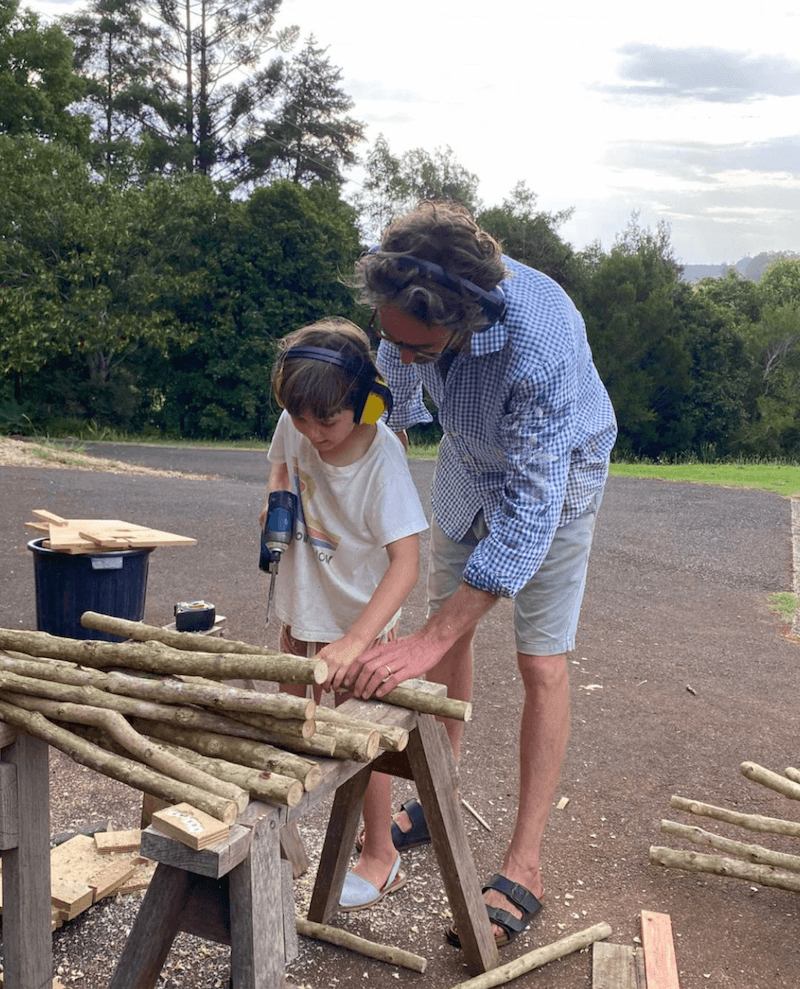
1. Cut or forage dry branches – either all the same width or a range, with the heaviest branches at the base. They need to be thick and sturdy enough to be able to drill through.
2. Plan the height and width of your tree and mark the length of each branch.
3. DIY a sturdy base, or use your existing Christmas tree stand – the important thing is to make sure the tree is secure and can’t easily tip over, especially if you have pets or little ones. We used a tree stump, inserting a steel rod or piece of timber dowel (you can get these from the hardware store), and hammering it into place.
4. Cut the branches to size and drill a hole through the middle that is wide enough for the rod or dowel to pass through.
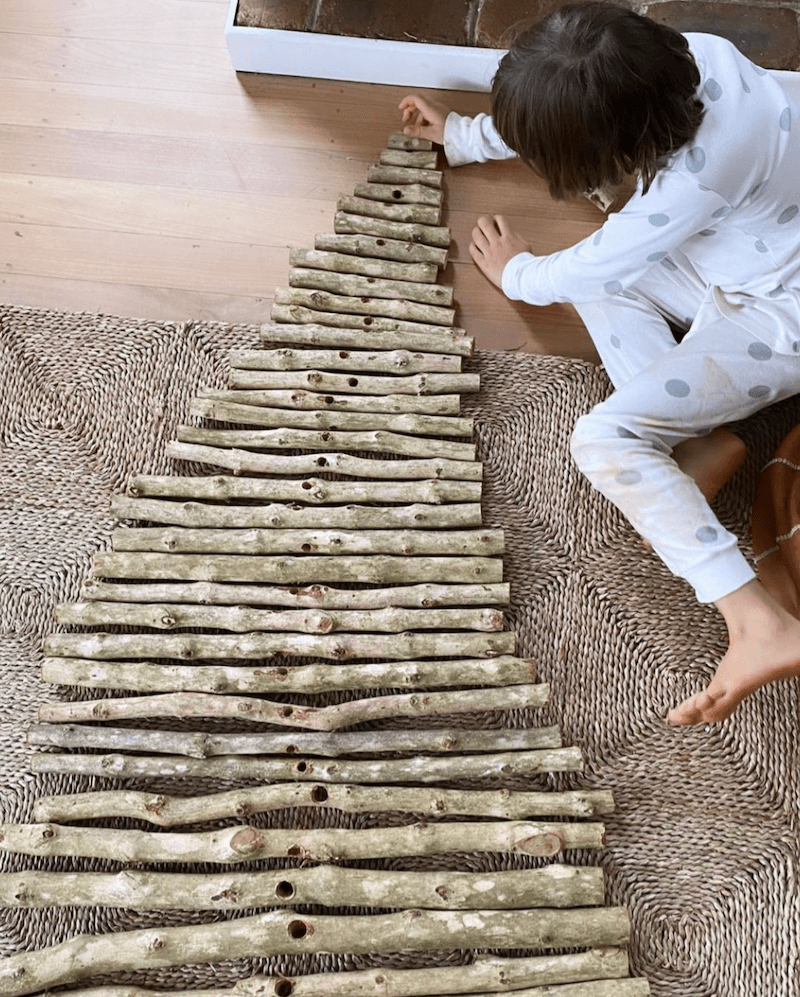
5. Lay out the branches to check the widths and make any adjustments.
6. Stack the branches on the base, starting with the longest ones and working your way up to the smallest pieces at the top.
7. For a fuller look, and to create room for ornaments, rotate each branch in a different direction (see first image) .

BONUS IDEA
Follow these same steps on a smaller scale to create a festive table centrepiece
There are so many possibilities for decorating more sustainably and creating fun memories and traditions in the process.
If you decide to give this project a try, let me know on Instagram by tagging @nataliewalton! I’m so excited to see what you create.

P.S. For more ways to celebrate without buying new, check out my NEW GUIDE to simplifying the holiday season.
WHAT’S INSIDE
Strategies for prioritising what’s most important to you
5 practical ways to simplify and let go of stress
25 ideas for more sustainable celebrations